


Is your comp built to finish a grabbed target?
Kalea's ultimate grabs one hero and slams them in the direction of your joystick. That is the entire payload. She does not group-engage like Atlas, she does not zone like Khufra, she does not peel-chain like Tigreal. Her whole kit is the setup for dropping one enemy into your team's laps, and if your team cannot close that kill in the brief window her grab gives them, you just spent your longest cooldown to deliver a healthy enemy to your backline.
Lock Kalea when your comp has a finisher who converts on isolated kills. Fanny, Lancelot, Saber, Ling, and Hayabusa all sit in that bucket: they need a single target grounded for a moment, not a 5-man knock-up to work in. She also fits when your mid lane is a burst mage (Eudora, Kagura, Valentina) who can chain-delete whoever you drag in. Rotational skirmish comps that contest 3-4 objectives a game are her ideal draft shape.
Bench her when the enemy has Diggie, Baxia, or any hero who specifically disarms pickoffs. Diggie's ultimate purifies her grab and grants CC immunity across the whole team, Baxia erases the healing her passive relies on, and Chou's dash blanks the entire setup in one button. Bench her again when your own team has no assassin follow-up: a 5-fighter draft with Thamuz, X.Borg, and Ruby has nobody to cash the pickoff. And bench her into a Fanny roam, because Fanny turns every Water Zone you set up into her own re-engage wall.
If you cannot name which hero on your team finishes the enemy you just grabbed, Kalea is the wrong pick. Patch 2.1.88 (patch notes) trimmed her early damage and stretched her Skill 2 cooldown, which only sharpens this: she is a setup roamer now, not a hero who bullies lanes on her own.
The one thing that makes Kalea work
Kalea is a pickoff hook pretending to be a support. Her heals are real but secondary; her zone is real but secondary; her enhanced basics are real but secondary. The ultimate is the identity. Every other button in her kit exists to make the ultimate land.
The Water Zone mechanic is where that becomes visible. Casting any skill drops a zone on the ground, and casting a second skill inside the zone consumes it to enhance her next three basic attacks: a dash-strike that closes to the target, a flurry that heals her and the lowest-HP ally nearby, and a final tail strike that spawns a fresh zone. That loop is not her damage plan, it is her spacing plan. The dash closes the gap to the target you want to grab, the heal keeps you alive through the approach, and the final hit resets the zone where you want the next fight to happen. Skill 2 works from the other direction: if her charge clips the edge of a Water Zone or hits a wall, it triggers a second leap you can recast as a slam, which is how you stack two knock-ups into a single rotation and stretch the grab window long enough for an assassin to close.
The ultimate finishes the sequence. It grabs a single hero, slams them in your joystick direction, and lands them well outside the cone Atlas works with. That landing range is the feature. You are not grabbing to damage, you are grabbing to relocate a squishy carry into your team's AOE, or into your turret.
Laning: the first few minutes
Kalea roams from the start. The early priority is setting up the first river fight, not hugging a lane.
- Take Skill 1 first at level 1. It clears the opening bush check and drops your first Water Zone, which gives you the leap-slam option if the enemy jungler shows on your side of the river. The passive enhancement does not exist without a zone on the ground, so the skill priority is not really a choice.
- Arrive at the turtle-side choke early with a zone already down. Do not walk in clean. Cast Skill 1 into the terrain you expect to fight on, then position at the far edge of the zone. If the enemy roam invades, your Skill 2 charges through them, clips the zone boundary, and leaps for the recast slam. That is the first kill window of the game.
- Do not burn the ultimate on a full-HP target. Her ult is on a long timer, and the 2.1.88 cooldown nerf to Skill 2 means a wasted grab also leaves you a beat slower to re-set the next one. A speculative ult that grabs a healthy tank turns you into a low-damage roamer with one short knock-up until it comes back. Save it for a confirmed kill or a clean pickoff.
The power spike you are farming toward
Kalea does not spike on a damage item. She spikes the moment her pickoff loop starts compounding, and that is a function of two passives, not raw stats.
Fleeting Time is the engine. Every kill or assist refunds a chunk of her ultimate's current cooldown, so the first successful pickoff brings the next one online faster, which lands the next, which refreshes it again. On the Support emblem the Pull Yourself Together talent does the same thing for Flicker: each kill or assist shaves its cooldown, so a roamer who is actually catching targets gets her engage and her blink back while the enemy is still buying back. A Kalea who is hitting pickoffs is a different hero from one who is missing them, and the gap widens with every fight.
The survivability half of the spike is her first completed defensive item (Thunder Belt or Dominance Ice over Tough Boots). Before it, she dies on the approach to any focused burst and never reaches grab range. After it, she lives through the walk-up, lands the grab, and gets out, which is the whole job. Build the defense before any damage outside the EXP-lane variant.
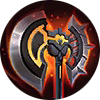
The exception is when she is solo-laning as a bruiser instead of roaming. There the spike really is War Axe: its Fighting Spirit stacks turn her enhanced basics into genuine damage and its cooldown reduction tightens the grab-setup loop, so a farmed Kalea can finish the target she grabs without help. That path trades her roam utility for self-sufficiency and only makes sense when your draft already has a frontline elsewhere.
Advertisement
Teamfight positioning and target priority
The reflex when the fight forms is to grab the enemy tank, because the tank is the closest target and the most reliably hittable. That reflex is usually wrong.
You grab the priority carry. Your assassin has already decided who dies before the fight started; your job is to deliver that target, not the hero your team was going to crowd-control anyway.
- Drop a Water Zone before you want to grab, not as you grab. Skill 1 into the terrain the fight will happen on, then approach. Engage without a zone and your Skill 2 has no leap phase and your passive has no enhanced basics, so you become a low-mobility body with one button.
- Flicker is a setup tool, not an escape. Save it for Flicker-then-ult on a repositioned marksman, or to close the last bit of distance on an enemy who stepped just out of grab range. Using it to retreat from a lost fight wastes your largest gap-closer on a fight you already lost.
- Do not ult into your team's center if the target has a dash out. Beatrix with Bennett up, Irithel on Heavy Crossbow, Wanwan with her tail uncleared: these heroes hit your team's middle and immediately phase to the other side. Slam them toward a wall or into your own turret instead. Turret damage on a landed grab is a confirmed kill; your team's AOE on a carry who phased away is nothing.
If your team has a Fanny, your target priority inverts. Slam the enemy carry toward the wall where Fanny is waiting, not into your team. Her cable kill needs the target isolated on her wall, and her window is longer than a standard follow-up, so feed her the pickoff rather than the pile.
Itemization: the roam path and its real conversations
The build cards above this article are correct: Kalea is a roam support first. Read this for the reasoning behind the slots, not for a list to copy.
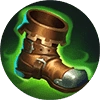
Boots and blessing set the plan. Tough Boots are the default because she is a diver who gets focused, and the CC-and-slow reduction is what lets her finish the walk-up. Take Conceal when you are playing for first-blood pickoffs (the stealth-and-speed active is a free engage), and Favor when your team needs the sustain (its bonus heal stacks on top of her passive's lowest-HP heal). Warrior Boots only belong on the EXP-lane War Axe variant.
Fleeting Time is close to locked on the roam build. The ultimate cooldown refund on kills and assists is the item version of her identity, so a pickoff roamer wants it online early.
First defense: Thunder Belt versus Dominance Ice. Thunder Belt when you need its periodic slow proc to actually land grabs in extended fights, and for balanced bulk against a mixed-damage enemy. Dominance Ice when the enemy leans on attack-speed carries (Melissa, Karrie, Irithel, Moskov), because its passives cut their attack speed and their healing the moment they hit you.
Oracle versus Athena's Shield for the sustain or anti-magic slot. Oracle when your team runs a heal-dependent comp (your own Estes, Floryn, or Angela), because its Bless passive boosts received shields and regen and turns her passive heal from mediocre into real. Athena's Shield when the enemy burst is mostly magic and you need the layered magic reduction to survive the dive.
Immortality is the standard closer. On a hero whose job is to walk into the enemy and get focused, a second life is often the difference between a trade and a throw. Swap it for a second bulk item only when you are already snowballing and want to brawl rather than gamble.
On emblem, the Support tree is the roam default (the Pull Yourself Together and Focusing Mark talents both feed the pickoff: one refreshes Flicker, the other amplifies your team's damage on the hero you just grabbed). The Fighter tree is only for the EXP-lane War Axe build, where you want firmness and sustain instead.
Mistakes that lose Kalea games
Five patterns that turn winnable games into losses on this hero.
Ulting before a Water Zone is on the ground. You grab a target, slam them down, and then your Skill 2 has no zone edge to clip, your passive has no enhanced basics ready, and you are standing next to a crowd-controlled enemy with no finishing tools. The first thing you do at the start of any fight sequence is Skill 1. Full stop.
Flicker-ulting into a Diggie team without checking his ultimate. Diggie's ult purifies your grab and grants CC immunity to the whole enemy team. If his ult is up and you commit, you just handed them a free fight. Track his ult before you engage: if he spent it recently you have a window, and if he has not, play for objective instead.
Saving the ultimate for the perfect pick. Her ult is not Fanny's ult; there is no bonus for the highlight-reel pickoff over the ordinary one. A long cooldown that you sit on after rotating to a fight is value bleeding out. Use it to initiate the kill you can get, not to wait for the perfect one that never arrives.
Charging Skill 2 with no wall or zone edge in the path. The whole point of Skill 2 is the two-phase knock-up. A charge that only triggers the first phase is a single brief airborne on one enemy, which is nothing on its own. Before you dash, check the minimap: you want a wall in front of the target or your own Water Zone behind them so the charge clips an edge and leaps.
Grabbing the enemy tank in a 5v5 group fight. The tank is the closest enemy to your team, so grabbing them drops them into your carries' faces, but your team was already going to fight the tank. What you needed was the marksman, and now the marksman is free to auto-attack from range while your team chips through the wall of HP you delivered.
Key Tips
Tip
Always Skill 1 before Skill 2 in a fresh rotation. The zone has to exist before the leap phase works, and a Skill 2 charge with no zone edge or wall is a wasted cooldown. The opening sequence is Skill 1, then position, then Skill 2 from the zone's far edge, then recast for the slam. Drill it until it is muscle memory.
Note
The Flicker-ult pickoff has a setup nobody explains: Flicker laterally or behind the enemy carry first, then ult toward your team. Closing that gap in one frame buys you a beat of confusion before the grab lands, which is usually enough for the carry to miss their escape button.
Tip
Her final enhanced basic spawns a new Water Zone where it lands, so you can chain fights across the map. End one fight with that hit, walk into the next bush, and your Skill 2 already has a zone to leap from. Space the enhanced basics out instead of dumping all three on the same target.
Note
Unlike Atlas and Franco, your ult grabs only one hero, so target selection is the entire skill expression. Atlas presses ult and lets the AOE sort it out; Kalea presses ult and lives with whoever she picked. Before you press it, confirm the target is the one your team is set up to finish, not just the one standing closest to you.